
IP restrictions provide an added layer of security and help maintain compliance with data protection regulations. By limiting access to specific IP addresses, you can ensure that only employees within a trusted network, such as your office or a secure VPN, can access customer information.
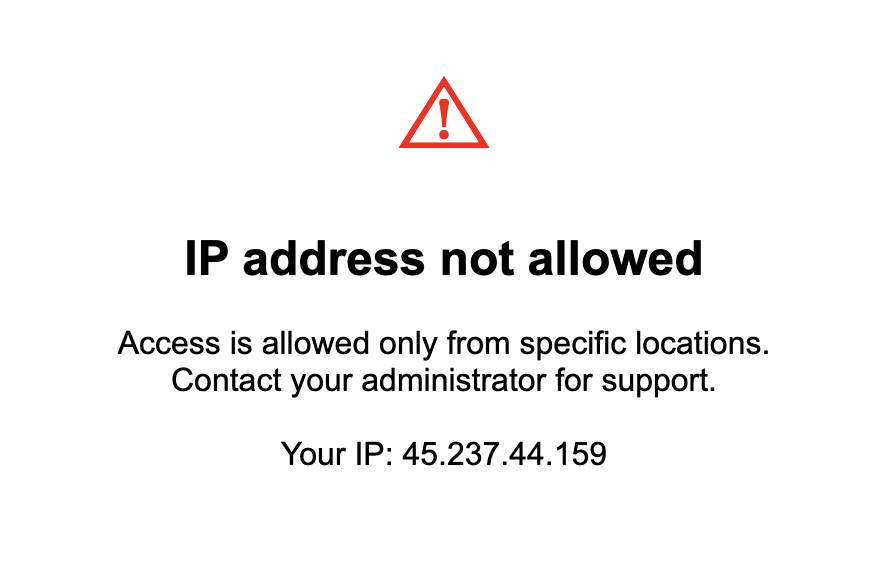
When you activate IP restrictions, users trying to log in from an IP address that is not included in your approved list will encounter an error message. Even if they enter the correct login credentials, they won’t be able to proceed.
Setup
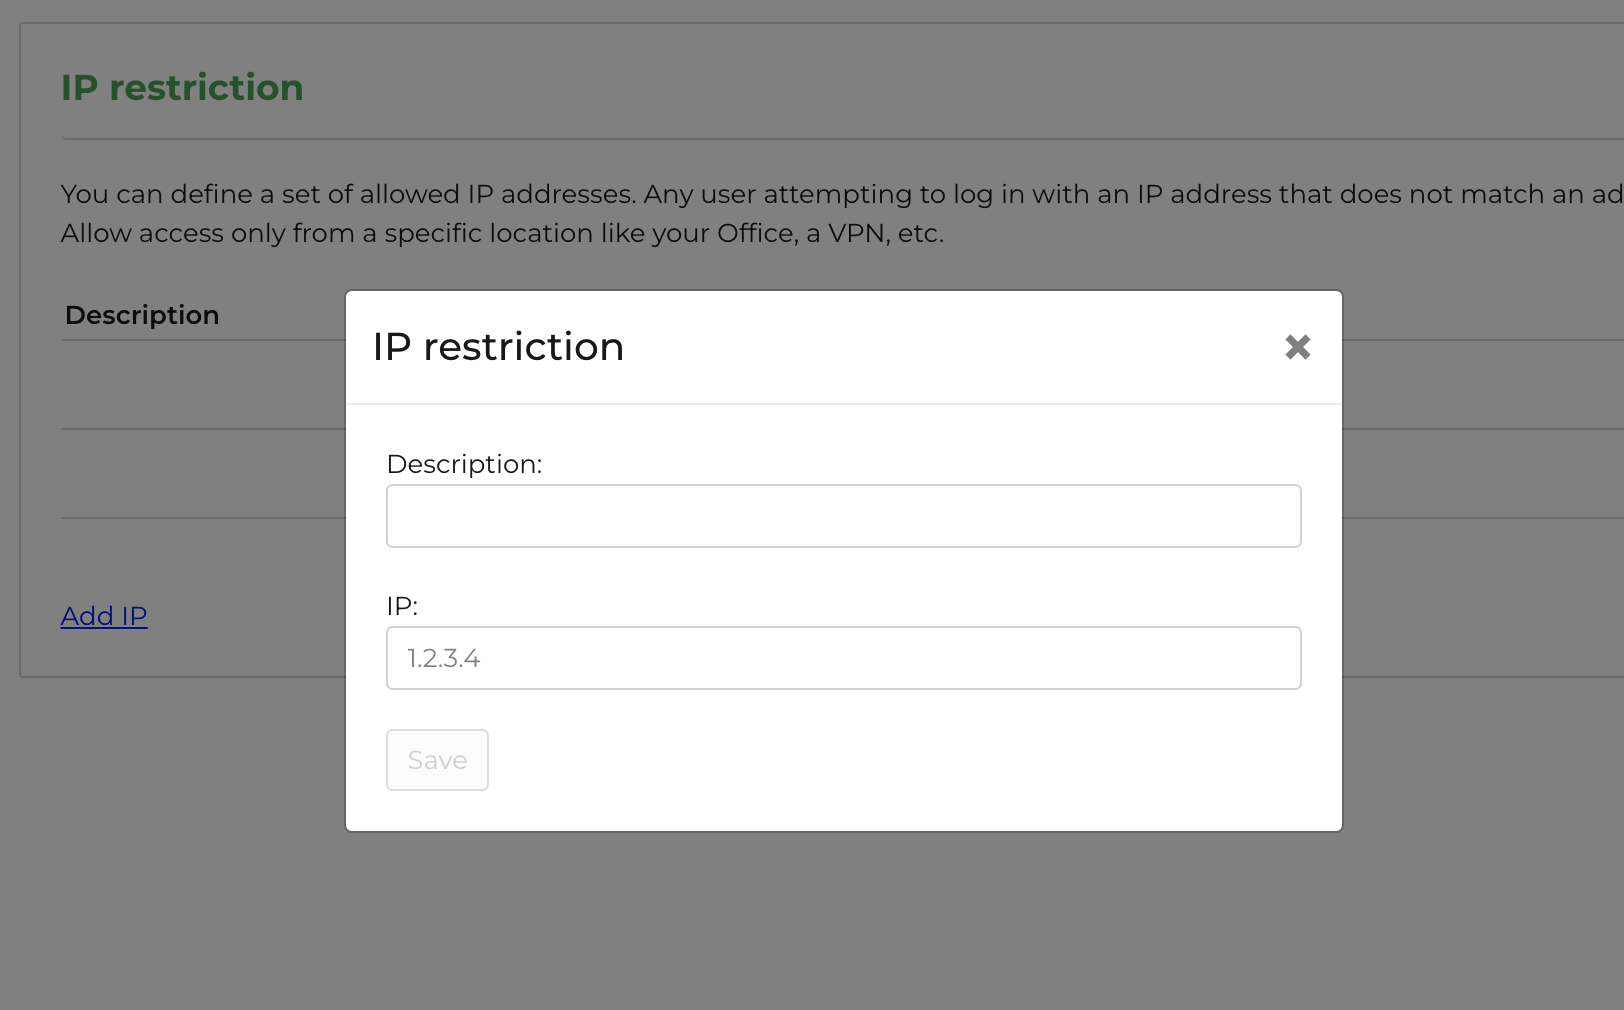
To access the this feature, go to your settings and locate “IP restriction” and add the allowed IP(s).
To ensure that no one gets blocked first add your own IP, then all relevant IP addresses. If you don’t add your own address, you will receive an error message like this:
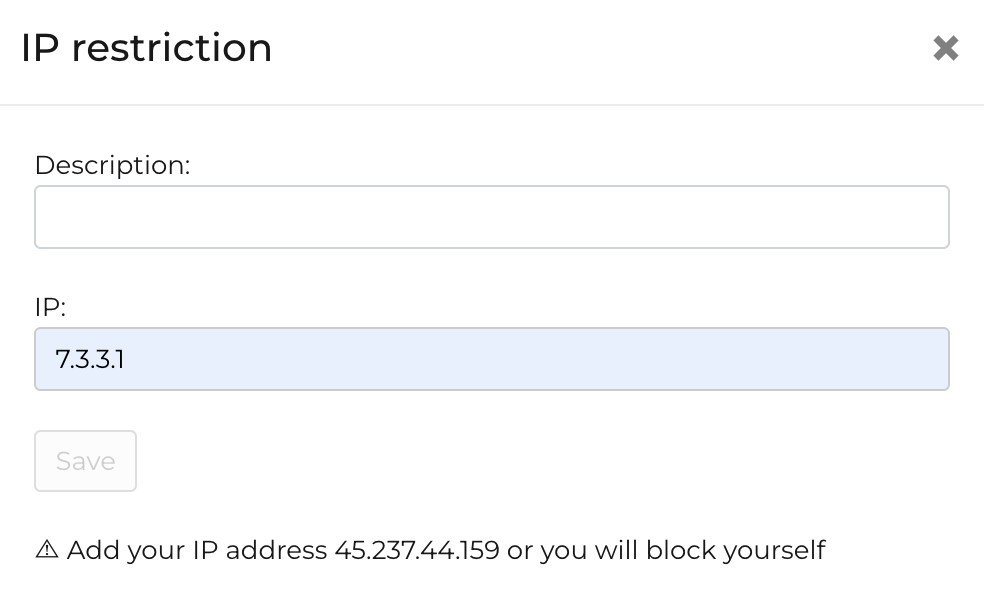
Provide a descriptive name for the IP address (Office, Home, etc.) and add in the respective IP address number. At the moment we do not support CIDR notations (i.e. 198.51.100.0/22)
Important considerations:
- Use this feature only if your team works with static IP addresses (addresses that don’t change over time), or at least if the administrator, who is responsible for keeping the account operational, can rely on a static IP.
- If your team accesses the internet using dynamic or shared IPs, we recommend setting up a Company VPN (Virtual Private Network) and adding the VPN IP to your approved list so that team members are forced to pass through that network.
- If you want to use IP restrictions but your team members can’t rely on a private IP address, you could allow shared IPs, as it would at least limit accessibility from the rest of the world.
Advanced plan required